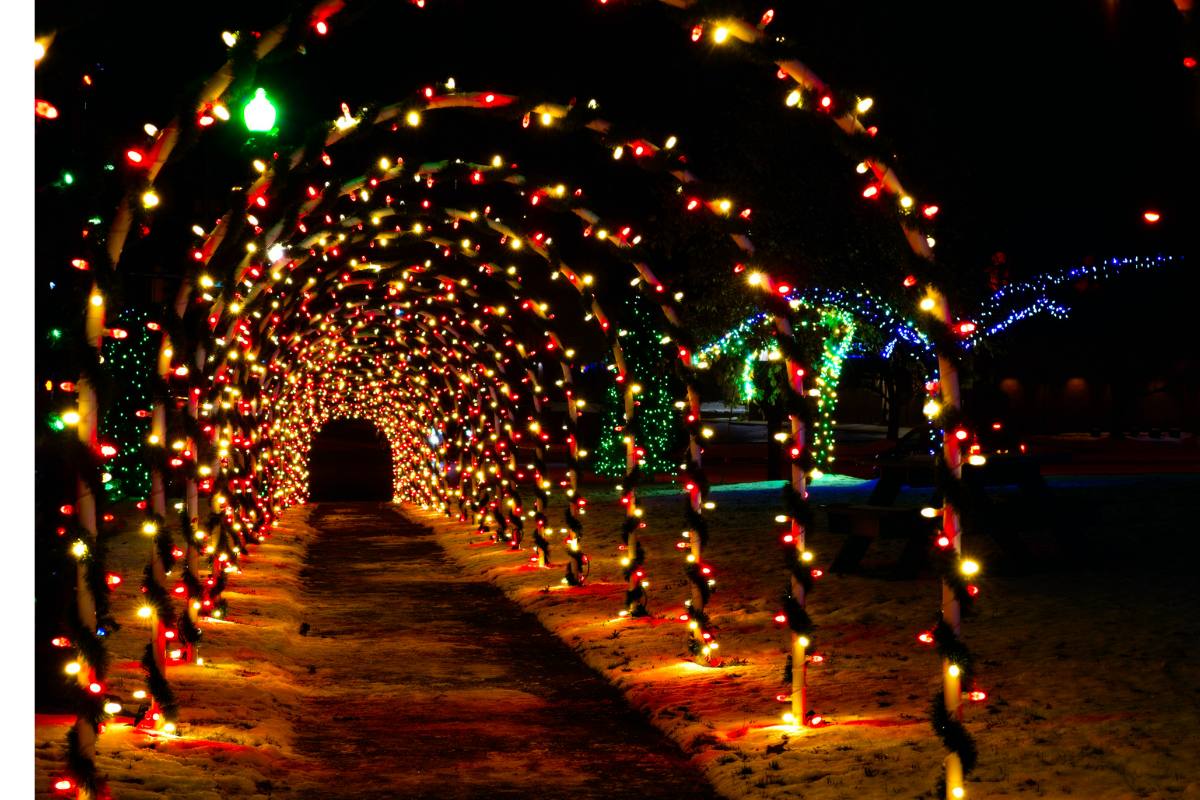
With the holidays around the corner, you might be looking to extend the dreamlike view of Christmas light decorations outdoors. But if you are bored of using the same outdoor décor style year after year, you should try building a DIY Christmas light driveway arch this year. Since driveway arches typically look sophisticated, they might look complicated to build. But then, they are pretty straightforward.
Materials Needed
- 6 pieces of ¾” schedule 40 PVC tubes measuring 30 feet in length
- 10 pieces of ¾” rebar measuring 1 foot in length
- 3 pieces of ¾” threaded cross PVC connectors
- 2 pieces of ¾” threaded tee PVC connectors
- 18 pieces of ¾” threaded PVC plugs
- PVC adhesive
- 6 strands of 100-light outdoor Christmas lights
- A pack of Christmas light hooks
I recommend using threaded plugs and connectors. With them, you can readily screw and unscrew the arch for storage.
How to Build a Christmas Light Driveway Arch
Step 1: Cut the PVC Tubing to Size
Once all the materials are in place, cut five pieces of the ¾” PVC tubes in half. When done with this, you should have 10 pieces of 15-foot PVC tubes.
Next, I will cut the last PVC tube into four parts, measuring 7.45 feet each.
You may cut the 30 feet PVC tubes into three 10-foot parts. This would give you 15 pieces of 10 feet PVC tubes, but you’ll need more PVC connectors. This is preferable if you want your arch to be curvier.
Step 2: Join the 15-Foot ¾” PVC Tubes
Glue one threaded PVC plug to one end of each of the 15-foot PVC tubes from Step 1. Once you are done, you can join the tubes in pairs with the PVC connectors.
The 10 pieces of 15-foot PVC tubes will form 5 arches – two will be at the end while three will be in the middle.
For each of the two end arches, screw two 15-foot PVC tubes to each other using a tee PVC connector. When you are done, you should have two 30-foot PVC tubes with a tee PVC connector at their center.
For each one of the other arches (the arches in the middle), screw two 15-foot tubes using a cross PVC connector. This should produce three 30-foot tubing with a cross PVC fitting at their center.
Step 3: Insert the Rebars Into the Ground
Hammer the rebars about 5 feet into the ground on either side of the driveway. Leave a gap of 7.5 feet between each rebar on the same side of the driveway.
The gap you leave between the rebars on the same side of the driveway is vital. It determines the gap between the arches.
If the rebars are unevenly gapped, the arches may look crooked. Also, connecting the arches might be complicated if the gaps between the rebars are excessive or insufficient.
In my case, I left 7.5 feet between each rebar because the connections between the arches would be about 7.5 feet long. I am making the connections between the arches about 7.5 feet long because our driveway is slightly over 30 feet long. Going by these, you may have to change your measurements depending on the size of your driveway.
Step 4: Attach the Joined 15-Foot PVC Tubes to the Rebars to Form Arches
After inserting the rebars into the ground, attach the joined 15-foot tubes to the rebars from side to side to form the arches.
Of course, the arches with a tee connector should start and end the tunnel. Then the arches with a cross connector should be in the middle.
Step 5: Connect Each Arch
Glue the remaining threaded PVC plugs to both ends of each 7.45-foot tube. Then connect the arches by screwing the 7.45-foot tubes into the arches’ PVC connectors.
Connecting the arches reinforces the whole structure, making it less wobbly.
Step 6: Decorate the Arch
Once everything else is done, decorate the arch with Christmas lights. To do this, wound each one of the Christmas light strands around the circumference of each arch. Then hold them in place with the Christmas light clips. This will leave you with one unused strand of Christmas light.
Wound the last strand of Christmas light along the tubes that connect the arches. Then hold it in place with the Christmas light clips.
Now you have a wonderful Christmas light driveway arch.


