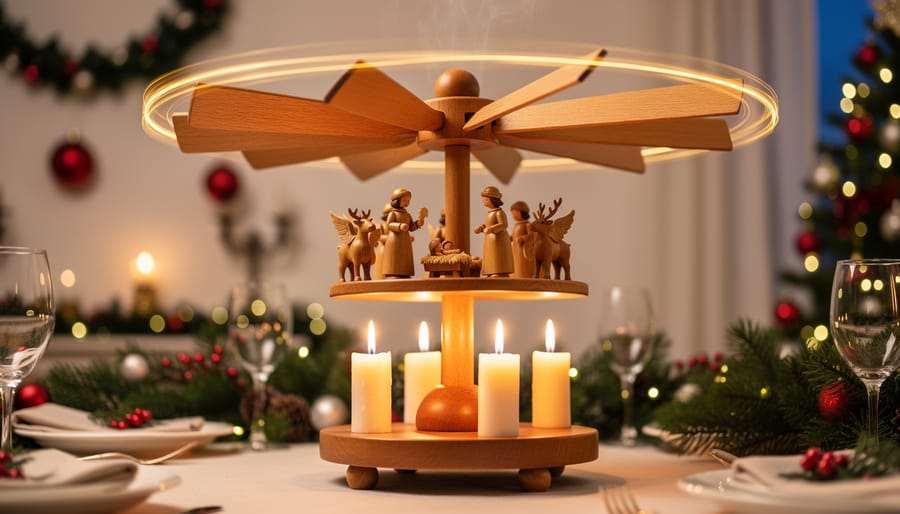
A candle Christmas carousel is a traditional European decoration that spins gracefully when you light candles beneath it, powered entirely by the rising heat. You can build one yourself in an afternoon using a few metal parts, wooden paddles or fan blades, heat-resistant materials, and tea lights or taper candles. The basic mechanism is simple: warm air rises from the candles, pushes against angled blades mounted on a center spindle, and creates rotation that brings tiny figurines, angels, or nativity scenes to life in a mesmerizing dance.
These enchanting decorations trace their roots to Germany and Scandinavia, where families have gathered around spinning pyramids for generations. The soft glow of candlelight combined with the gentle whir of movement captures something magical about the season, a reminder of slower, quieter celebrations before electric lights took over. Children watch wide-eyed as wooden horses prance in circles or choir angels seem to float above the flames, and the whole experience feels like stepping into a snow globe.
Making your own carousel lets you choose the theme, scale, and level of detail that fits your home. Some crafters build towering pyramids with multiple tiers, while others prefer a single level showcasing a handful of beloved figures. The project requires patience and careful assembly, especially when balancing the blades and ensuring smooth rotation, but the result is a treasured heirloom that brings warmth and wonder to your holiday table year after year.
What You’ll Need to Build Your Candle Carousel
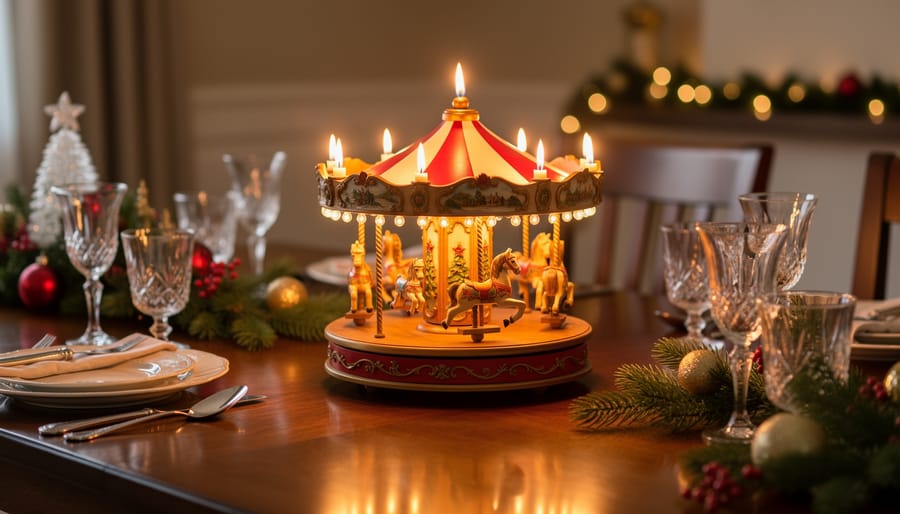
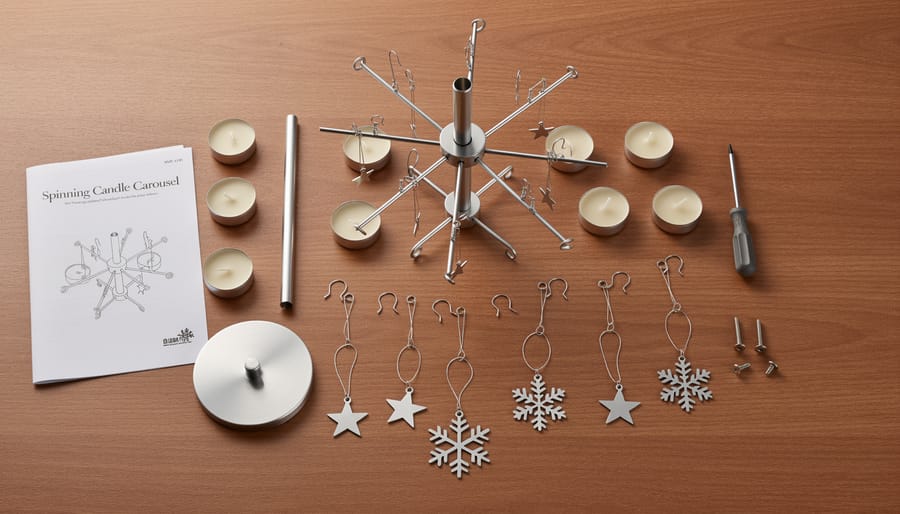
Building a candle Christmas carousel requires careful selection of materials that can withstand heat while creating the enchanting spinning motion that makes these decorations so mesmerizing. Whether you’re constructing from scratch or enhancing a pre-made kit, gathering the right components ensures your carousel will rotate smoothly and safely throughout the holiday season.
Essential Materials and Tools:
- Structural base: Sturdy wooden platform or metal frame (12-18 inches diameter) for stability
- Central spindle: Metal rod or wooden dowel (¼ to ½ inch diameter) with ball bearings or smooth pivot point
- Propeller blades: Lightweight metal (brass or copper) or heat-treated wood, cut to 3-6 inch lengths
- Candle holders: Metal cups or heat-resistant ceramic holders sized for your chosen candles
- Candles: Tea lights, tapers, or specialty Christmas candles (4-6 needed); avoid heavily scented varieties as candle scents can interfere with indoor air quality during extended burning
- Decorative tiers: Thin wood or metal platforms for mounting figurines at various heights
- Christmas figurines: Angels, nativity characters, or woodland animals (lightweight resin or wood)
- Heat-resistant adhesive: High-temperature glue or epoxy rated for candle heat
- Paints and finishes: Acrylic or enamel paints, metallic accents, wood stain, clear sealant
- Assembly tools: Hand saw or rotary tool, drill with small bits, sandpaper, paintbrushes, ruler
If you’re working from a kit, you’ll still want paints, additional decorations, and proper candles to customize your carousel. The quality of your materials directly impacts how smoothly your carousel spins, cheap components often result in wobbling or friction that prevents the magical rotation that defines these beloved Christmas traditions.
Safety Precautions Before You Begin
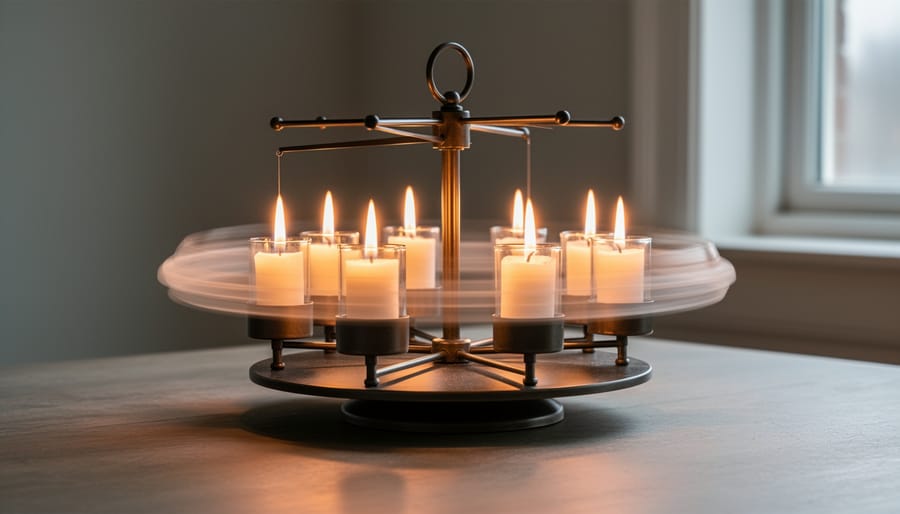
Before you begin crafting your candle Christmas carousel, understanding the fire hazards and mechanical risks is essential to prevent accidents and keep your holiday celebrations safe. Working with open flames requires careful attention to your workspace setup and continuous monitoring throughout operation.
First, choose a completely stable, level surface away from curtains, wreaths, garlands, and any other flammable decorations. Your carousel should sit at least three feet from walls, furniture, and anything that could catch fire if the spinning mechanism malfunctions or candles tip. Apply basic holiday fire safety principles: keep a fire extinguisher nearby and ensure smoke detectors are working properly.
Proper open flame ventilation matters significantly when burning multiple candles indoors. Open a window slightly or run gentle air circulation to prevent carbon monoxide buildup, though avoid strong drafts that could cause uneven burning or blow decorative elements into the flames.
Use only heat-resistant materials for any components near the candles and rotating blades. Test your carousel’s spinning mechanism completely assembled but without decorations first, ensuring smooth rotation with no wobbling or friction points that could cause the structure to tip. Keep children and pets at a safe distance, explaining that while beautiful, the carousel is not a toy and becomes hot during operation. Store matches and extra candles securely out of reach.
Step-by-Step: Building Your Spinning Carousel
Creating the Base and Spindle Assembly
The foundation of your candle carousel determines whether it spins smoothly or wobbles disappointing. Start with a sturdy wooden base at least 10-12 inches in diameter, pine or birch works beautifully and won’t warp from candle heat. Cut a perfect circle using a jigsaw, then sand all edges until they’re glass-smooth.
The spindle assembly sits at dead center. Drill a pilot hole straight through the base’s exact middle point. This hole needs to fit your spindle pin snugly but allow the upper rotating platform to turn freely. Most builders use a 1/4-inch metal rod or a long finishing nail as the spindle shaft.
Here’s the critical part: the clearance. Insert your spindle vertically through the base hole, securing it from underneath with a washer and small nut. The spindle should stand perfectly upright, check it with a level. Leave 6-8 inches of shaft extending above the base to accommodate your rotating platform and decorative tiers.
Test the rotation before proceeding. Place a cardboard disc with a center hole onto the spindle. It should spin freely with just a finger flick, rotating for several seconds without wobbling or scraping. If it binds, enlarge the hole slightly. If it’s too loose and tilts, try a washer as a spacer to reduce play while maintaining smooth rotation. This balance between stability and freedom makes all the difference.
Installing the Propeller Blades for Proper Rotation
The propeller blades are the heart of your carousel’s spinning magic, transforming rising heat into mesmerizing rotation. Getting the angle right makes all the difference between a carousel that spins smoothly and one that barely turns.
Position each blade at a 30 to 45-degree angle from horizontal, tilting upward to catch the warm air rising from your candles below. Think of airplane propeller blades or a pinwheel. Too flat, and the heat streams past without generating rotation. Too steep, and you’ll create resistance instead of smooth movement. A 40-degree angle typically works best for most designs, giving you that satisfying, steady spin.
Attach the blades securely to your center spindle using small screws, pins, or heat-resistant adhesive, spacing them evenly around the shaft. Four blades work well for most carousels, positioned at 90-degree intervals. If you’re using three blades, space them 120 degrees apart.
Weight matters enormously. Each blade must weigh the same, or your carousel will wobble and spin unevenly. If using lightweight materials like tin or aluminum, cut identical pieces using a template. For wooden blades, sand them to matching thickness and check balance by resting the spindle on your finger, it shouldn’t tilt toward any particular blade.
Test the rotation by gently spinning the assembly with your hand. It should turn freely without friction or resistance, coasting for several seconds before stopping.
Adding Decorative Tiers and Holiday Scenes
Once your propeller and spindle are working smoothly, the real magic begins: bringing your carousel to life with Christmas scenes that dance in candlelight. The key is balancing beauty with function, because every ornament you add affects how your carousel spins.
Start by cutting circular platforms from thin plywood or sturdy cardboard, each slightly smaller than the one below it to create that classic tiered pyramid silhouette. Most carousels have three to four levels. Attach these platforms to the central spindle with evenly-spaced support rods, leaving enough vertical clearance between tiers so figurines don’t bump as they rotate.
Now comes the joyful part: arranging your holiday scenes. Traditional German pyramids often feature nativity figures on the bottom tier, angels playing instruments on the middle level, and a star or dove at the top. You might create a winter village with tiny houses and snow-covered trees, or arrange carol singers around each platform. Whatever you choose, keep weight distribution in mind. Place heavier figurines opposite each other around the circle, and use lightweight materials whenever possible. A lopsided carousel wobbles and slows.
Secure each piece with small dabs of hot glue or museum putty so nothing shifts during rotation. For extra festive flair, draw inspiration from candle ring ideas that layer greenery, berries, and small ornaments around the base tier, echoing the circular motion above. Paint your platforms in traditional reds and greens, or brush on metallic gold for a vintage glow. The decoration should feel abundant but not crowded, each tier telling its own part of your Christmas story as it spins past the light.
Finishing Touches and Color
Once your carousel structure is complete, painting transforms a basic assembly into a cherished heirloom. Traditional German pyramids often feature natural wood tones with touches of forest green and deep red, while a coat of metallic gold or antique copper on the propeller blades catches candlelight beautifully as they spin. For a vintage look, lightly sand painted surfaces after they dry to reveal wood grain beneath, creating an aged patina.
Consider your existing Christmas décor when choosing colors. Crisp white with silver accents suits modern minimalist themes, while rich burgundy and hunter green evoke Victorian elegance. Don’t forget the figurines, hand-painting angels’ robes in cream and gold or village houses in candy-cane stripes adds personality. Small details matter: a dusting of artificial snow on rooftops, tiny wreaths on doorways, or subtle glitter on star toppers make your carousel truly distinctive. Seal everything with heat-resistant varnish to protect against candle soot and preserve your artistry for seasons to come.
Testing Your Carousel and Troubleshooting Common Issues
Once your carousel is fully assembled, it’s time for the magical moment when everything comes together. Place your carousel on a stable, heat-resistant surface away from drafts, curtains, and anything flammable. Light the candles starting from the outside working inward, using a long-reach lighter for safety. Within two to three minutes, you should see the propeller blades begin to catch the rising warm air and start their gentle rotation.
Watch closely during these first few minutes. Successful operation means smooth, consistent spinning at roughly one rotation every 10-20 seconds, depending on your design. The movement should be quiet and hypnotic, with no grinding sounds or jerky motion. If your carousel remains stubbornly still after five minutes, the blade angle is likely too shallow. Carefully adjust each propeller blade to a steeper angle, around 35-40 degrees, to catch more rising heat. Make adjustments when the carousel is completely cool.
Uneven or slow spinning often signals imbalanced weight distribution. Check that decorations are positioned evenly around all sides, and verify the spindle rotates freely without friction. A drop of sewing machine oil on the center bearing point can work wonders if the rotation feels sticky. If the carousel wobbles or tilts during operation, the base isn’t level or the spindle needs realignment.
Should one blade catch more air than others, creating jerky movement, gently bend it to match the angle of the smoothest-spinning blade. The goal is synchronized airflow across all propellers, creating that enchanting, steady rotation that makes these carousels so mesmerizing to watch on cold December evenings.
Decorating Ideas and Cultural Traditions
The German Weihnachtspyramide stands as the original inspiration for candle carousels, with designs dating back to the Ore Mountain mining regions of Saxony in the 1700s. Traditional pyramids feature multiple tiers of hand-carved wooden figures depicting miners, nativity scenes, or forest animals, painted in rich burgundy, forest green, and natural wood tones. These authentic designs honor centuries-old European Christmas traditions though modern interpretations have expanded far beyond these classic themes.
For your carousel, consider a nativity theme with Mary, Joseph, and shepherds on the lower tier, angels circling above, and a star at the peak. Angel choirs work beautifully when you arrange winged figures at different heights, each holding instruments or candles. Winter village scenes let you position tiny houses, evergreen trees, and skating figures around the platforms, creating a miniature Bavarian hamlet.
Woodland creature designs bring whimsy to the tradition. Arrange deer, foxes, and rabbits among snow-dusted pine trees, or create a Santa’s workshop theme with elves crafting toys on each level. Victorian Christmas interpretations lean toward ornate details: lace-trim edges, gold leaf accents, carolers in period dress, and vintage toy imagery.
Different cultures have adapted the spinning pyramid concept. Austrian versions often emphasize alpine village scenes reflecting Christmas in Austria while Scandinavian designs incorporate simplified geometric patterns and natural birch finishes. Czech carousels sometimes feature folk art motifs with brightly painted flowers and hearts.
The beauty of building your own carousel lies in blending traditional elements with personal touches. Combine classical nativity figures on one tier with family-favorite characters above, or paint traditional German designs in colors matching your modern décor. Your carousel becomes a unique intersection of heritage and home.
Caring for Your Candle Carousel Through the Seasons
Your candle carousel deserves the same care you’d give any cherished heirloom. After the holidays, let it cool completely before handling. Wipe away soot deposits with a soft, dry cloth, then tackle stubborn residue with a barely damp cloth and mild soap. Avoid soaking wooden parts.
Store your carousel in a climate-controlled space where temperature swings won’t warp the wood or loosen glue joints. Wrap it loosely in acid-free tissue paper, never plastic, which traps moisture. A sturdy box with padding prevents accidental bumps that could bend delicate blades.
Check the center spindle yearly. If rotation feels sticky, apply a tiny drop of sewing machine oil where the shaft meets its housing. Too much will attract dust and gum up the works.
Refresh chipped paint with matching colors before the new season. Touch-ups now prevent wider damage later.
Choose quality candles that fit snugly in their holders and burn without smoking. Cheap candles leave excessive soot and may drip wax onto your decorations. Pure beeswax or high-grade paraffin candles burn cleaner, protecting both your carousel and your lungs.
With proper attention, your spinning treasure will glow for generations.
Frequently Asked Questions
Why won’t my carousel spin?
The most common culprits are blade angles set too shallow (aim for 30-45 degrees), candles positioned too far from the blades, or friction in the center spindle. Check that your carousel sits level, the spindle rotates freely without binding, and the blades are angled to catch rising heat effectively.
What type of candles work best?
Traditional taper candles or tea lights in metal cups provide the most consistent heat for reliable rotation. Choose unscented varieties to avoid coating your carousel in waxy residue, and stick to white or ivory for cleaner burning, colored candles often leave more soot.
Can I use LED candles instead of real flames?
Battery-operated LED candles won’t spin a traditional carousel because they produce no heat to move the blades. Some craftspeople have adapted carousels with small battery-powered motors hidden in the base, but this removes the authentic charm of heat-driven rotation that makes these decorations magical.
Is it safe to leave my carousel burning overnight?
Never leave candles burning unattended, even on a carousel. Always extinguish flames before going to bed or leaving the room for extended periods, and keep a working smoke detector nearby whenever you light your carousel.
Two other questions come up regularly during the holiday season. People wonder how many candles their carousel needs, this depends on size, but most designs work best with four to six candles evenly spaced around the base to create balanced heat flow. Fewer candles may produce sluggish rotation, while too many can create erratic airflow that makes the carousel wobble.
Soot buildup frustrates many carousel owners, especially those who burn theirs nightly throughout December. The key is trimming candle wicks to a quarter inch before each lighting and ensuring good air circulation around your display. Position the carousel away from walls or curtains where stagnant air traps smoke. After each use, let everything cool completely, then wipe the blades and upper tiers with a soft cloth. For stubborn black deposits, a slightly damp cloth with mild dish soap works wonders without damaging painted finishes. Regular cleaning between uses prevents soot from accumulating into a thick, sticky layer that dulls your carousel’s shine and eventually gums up the rotation mechanism.
There’s something truly magical about watching candlelight set a carousel spinning, its gentle rotation casting dancing shadows across the room. You’ve now created more than just a decoration, you’ve built a living piece of Christmas tradition that will captivate family and friends for years to come.
Each time you light those candles and watch the blades begin their slow, mesmerizing turn, you’re connecting with generations of Christmas celebrations past. The flickering glow, the delicate movement, the wonder in children’s eyes, these simple pleasures remind us that the most memorable holiday moments often come from handmade treasures.
As your carousel spins through this season and many more, it becomes part of your family’s story, a beloved centerpiece that marks the return of Christmas magic each year. May its gentle rotation and warm glow fill your home with joy, wonder, and the timeless spirit of celebration.