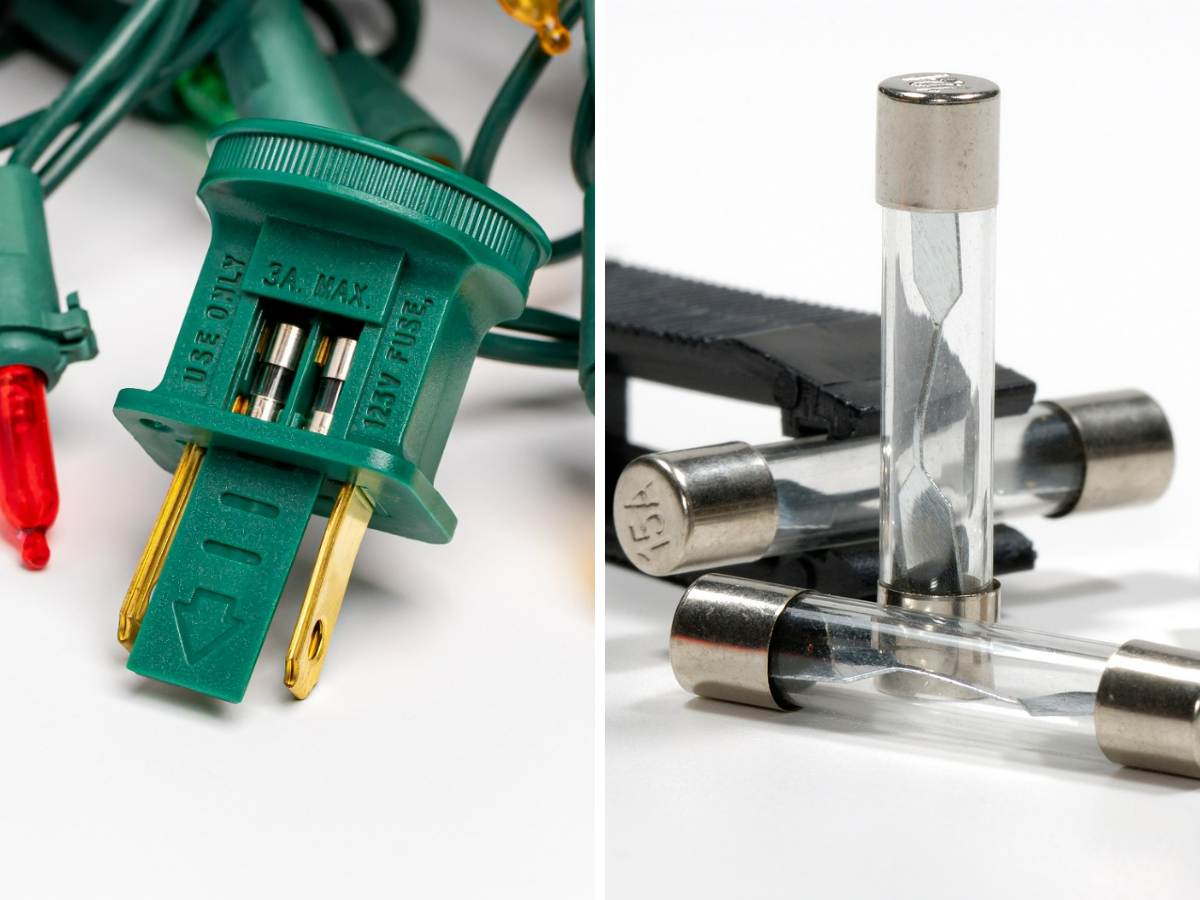
In many cases, when your Christmas lights are not coming on, the first thing to do is confirm that the fuse is okay. If the fuse is blown, you must replace it to fix your Christmas light.
Replacing Christmas light fuses is pretty easy; following the steps, you should be able to pull it off quickly and safely.
7 Steps to Replace a Blown Fuse in Christmas Lights
Materials Needed:
- Small or medium-sized flathead screwdriver
- These replacement fuse(s)
- Christmas lights
Step 1: Unplug the Christmas Light
The first thing to do when replacing a blown light fuse is to unplug the light. This step is pretty vital since it is for safety. Trying to replace the fuse of your Christmas light while it is still connected leaves you at risk of electrocution.
Step 2: Pick Out the Male Plugs of the Faulty Strands
After disconnecting the whole Christmas light, seek out the male plug of the light strands that are not working. Fuses are installed in male plugs, not female plugs. Hence, the need to pick the male plugs of the faulty strands out.
The number of replacement fuses you will need depends on how many faulty light strands you have.
Step 3: Look for the Fuse Compartment

The fuse compartment will be on one of the 2 sides of the plug, typically the underside. It is usually marked with an arrow pointing outwards and an inscription that says “OPEN” on the fuse panel.
Step 4: Remove the Old Fuse(s)
Now that you’ve found the fuse compartment, you have to remove the old, burnt fuse before you replace it.
To remove the old fuse, you must open the door concealing the fuse within its compartment. For clarity, the door of the fuse compartment is what is marked with an arrow pointing outwards and an inscription that says “OPEN.”
Place the tip of the flathead screwdriver in one of the grooves of the door of the fuse compartment. Then push outwards in the direction of the arrow.
In some cases, you may not even need the screwdriver to slide the door open. Your thumb may just be enough to slide the door open.
Once you slide the fuse panel open, use the screwdriver to gently push the fuse out.
Step 5: Examine the Old Fuse(s)
Once you’ve removed the old fuse, you must examine it to ensure it is the true reason why your Christmas light is not working.
To confirm that the fuse is bad, look out for the following signs:
- The smell of burnt cable
- Darkening on the fuse
- No wire in the fuse/disjointed wire
If the signs above do not work for you, you may test the fuse with a voltmeter (fuse tester).
Step 6: Insert the Replacement Fuses

Once you’ve confirmed that the fuse(s) is truly faulty, replace it. To replace the fuse, simply place the replacement in the same spot the old fuse used to be. Then slide the fuse compartment door shut by pushing it inwards.
Step 7: Plug the Strand and Test It
After replacing the fuse, plug the strand into a power outlet. If the fuse(s) was the problem, the lights should come on now that you’ve put in a new fuse. But if it does not come on, troubleshoot further; the problem is most likely not from the fuse.
The short video below will help you understand how to change blown fuses on Christmas lights:


