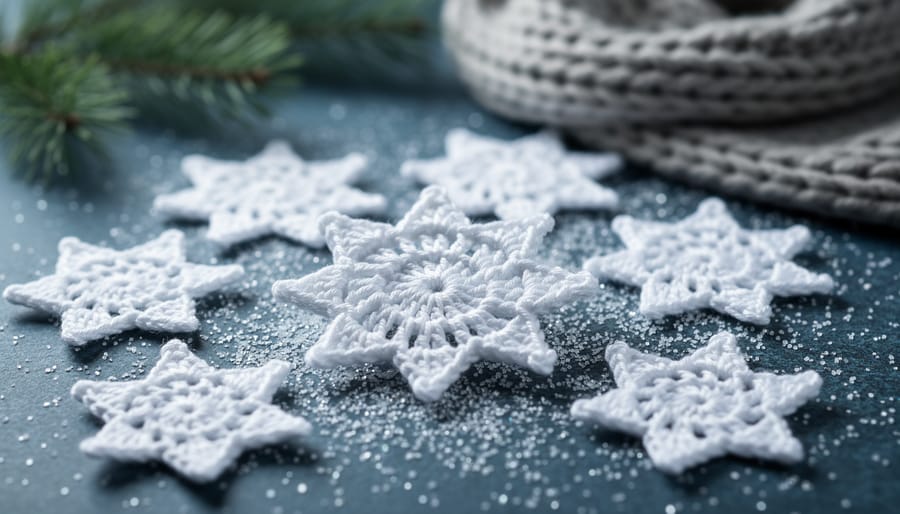
Creating delicate crochet snowflakes for holiday decorating requires nothing more than basic thread, a small steel hook, and a simple pattern worked in the round. Most snowflake patterns are small motifs measuring three to six inches across, crocheted with fine thread or 4-ply yarn and stiffened with fabric starch to hold their shape. The entire process takes between twenty minutes to an hour per snowflake, depending on the complexity of the design, making them perfect for those late October evenings when the first whisper of winter settles in and you start dreaming of a house dressed for Christmas.
The magic of crochet snowflakes lies in their versatility. String them into garlands that drape across mantels and windows. Scatter them across your holiday table as delicate coasters. Cluster dozens on a wreath or create a stunning tree made entirely of white lacework. There’s something deeply satisfying about working row after row in the round, watching a flat circle transform into an intricate frozen star beneath your fingertips, each one slightly different from the last.
Right now, you’ll find hundreds of free patterns waiting to be downloaded from sites like LoveCrafts, which offers everything from easy beginner designs to intricate snowflake blanket motifs. Yarnspirations provides the beloved Red Heart Tree of Snowflakes pattern as a no-signup-required download, while EyeLoveKnots has curated fifty different free designs, and The Crochet Crowd shares patterns complete with tutorials and diagrams. The abundance means you can experiment freely, finding the shapes and styles that speak to your vision of winter wonder.
What You’ll Need to Begin Your Snowflake Journey
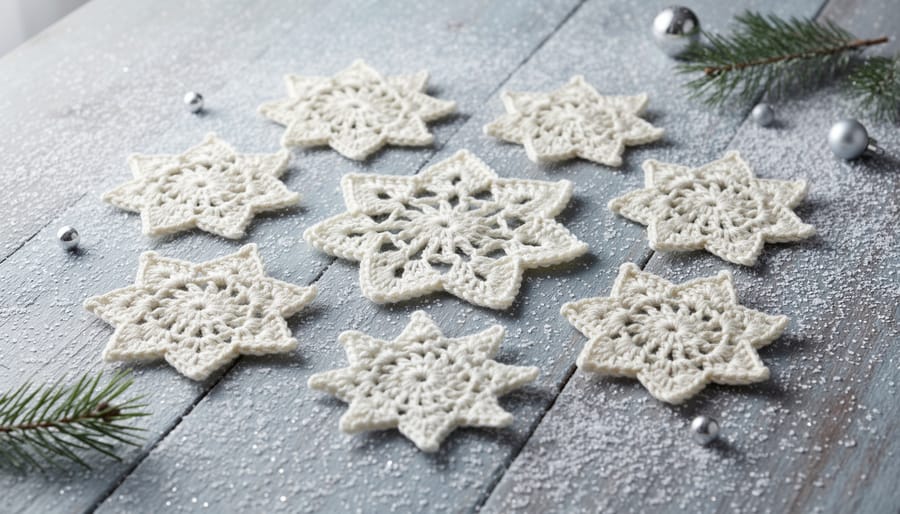
The beauty of crocheting snowflakes lies in their simplicity, you need remarkably little to create something truly magical. Most crafters discover they already own half the supplies, tucked away in their yarn basket from previous projects. This accessibility makes snowflake crochet the perfect entry point for holiday crafting, whether you’re picking up a hook for the first time or returning to crochet after years away.
At the heart of every delicate snowflake sits the right yarn. Traditional patterns call for crochet thread (size 10 or 20) or lightweight 4 ply yarn in crisp white or winter cream. These fine threads create the lacy, intricate appearance that mirrors nature’s own frozen masterpieces. If you prefer slightly larger snowflakes with more visible stitches, DK or sport weight yarn works beautifully and crochets up faster for impatient hands eager to see results.
Your essential supplies include:
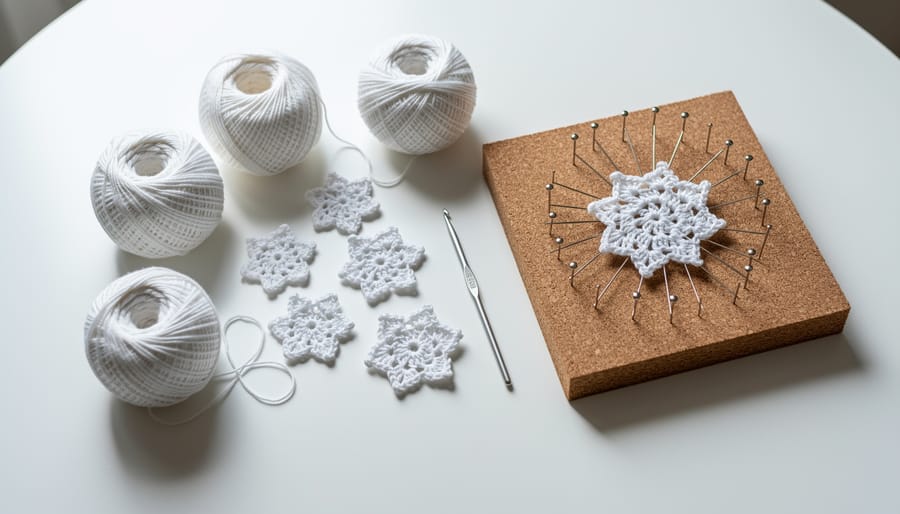
- Crochet thread (size 10 or 20) or 4 ply yarn in white, cream, or winter colors
- Steel crochet hooks in sizes 1.5mm to 2.5mm for thread, or 3.5mm to 4mm for DK weight
- Fabric stiffener, liquid starch, or homemade sugar water solution
- Rust-proof blocking pins or T-pins
- Foam blocking board or thick towel covered with plastic wrap
- Sharp scissors and yarn needle for weaving in ends
- Optional: iridescent glitter, spray adhesive, ribbon or string for hanging
The investment remains wonderfully modest. A single ball of crochet thread costs less than a coffee and yields dozens of snowflakes, while most stiffening supplies sit in your laundry room already. Many crafters create their first snowflake using supplies totaling under ten dollars, proving that handmade holiday magic doesn’t require a hefty budget, just a bit of time and the willingness to let your creativity sparkle.
Important Tips Before You Start
Before you settle in with your hook and thread, let’s talk about a few gentle precautions that will make your snowflake journey smoother and safer. These delicate little creations require a touch of care that larger crochet projects don’t demand.
Working with fine thread and small hooks means your hands and eyes will be doing more intricate work than usual. Position yourself near a good, bright light source, natural daylight is wonderful, but a quality task lamp works beautifully for evening crafting sessions. Your eyes will thank you after an hour of following tiny stitches, and you’ll find the work goes faster when you can clearly see each loop.
Thread tension deserves special attention with snowflakes. Unlike bulkier yarn that forgives slight variations, delicate thread shows every inconsistency. Keep your tension light and even throughout, pulling too tightly can distort the snowflake’s shape and make blocking difficult later. If you notice your fingers cramping, that’s your signal to relax your grip and take a short break.
Store your works-in-progress in small zipper bags or wrapped in tissue paper. Thread tangles far more stubbornly than yarn, and there’s nothing quite as frustrating as spending twenty minutes untangling instead of creating. A little organization now saves considerable heartache later.
Finding the Perfect Free Pattern for Your Skill Level
Beginner-Friendly Patterns
If you’re new to crochet snowflakes, start with simple round motifs that teach the basics without overwhelming you. Look for patterns labeled “easy” or “beginner” on sites like LoveCrafts, where you’ll find free designs specifically created for first-time snowflake makers. These patterns typically use basic stitches, chain, single crochet, and double crochet, worked in just a few rounds to create delicate shapes perfect for tree decorations or gift toppers.
The beauty of beginner patterns is that they’re small enough to finish in an evening, giving you that satisfying sense of completion quickly. Most work from a magic ring outward, building symmetry naturally as you go. Choose designs with clear, round construction rather than elaborate points or layered textures, you can always progress to more free crochet patterns once you’ve mastered the fundamentals. Your first snowflake might not be perfect, but watching those delicate loops transform into something crystalline and beautiful will have you reaching for your hook again and again.
Intermediate and Decorative Designs
For those who’ve mastered the basics and crave intricate lacework, intermediate patterns offer delicate, multi-layered designs that become true showpieces. The Red Heart Tree of Snowflakes pattern exemplifies this category, a free, intermediate-level design that builds dimension through complex stitch combinations and layered rounds. What makes these patterns special is their architectural quality: each round adds depth and detail, creating dimensional points and openwork that catches light like real ice crystals. Experienced crafters appreciate the challenge of maintaining tension across multiple pattern repeats while working intricate clusters, picots, and chain spaces that form elaborate star points. These decorative snowflakes, often larger than beginner versions, transform into stunning statement pieces for mantels, wreaths, or framed wall art. The satisfaction of completing one rivals finishing a small doily, you’ve created genuine heirloom-quality lacework that celebrates both your skill and the nostalgic beauty of traditional crochet artistry.
Step-by-Step: Bringing Your Snowflake to Life
Download and Review Your Pattern
Your first step is finding that perfect pattern that speaks to your heart. The beauty of today’s crochet community is that wonderful designers share their snowflake patterns freely. Sites like Yarnspirations offer their designs as free downloads with no sign-up required, making it as simple as a single click to have a pattern in your hands. Browse collections at LoveCrafts, EyeLoveKnots, or The Crochet Crowd until a snowflake catches your eye.
Once you’ve downloaded your chosen pattern, take a moment to truly read through it before picking up your hook. Pour yourself a cup of cocoa, settle into your favorite chair, and familiarize yourself with what lies ahead. Note the yarn weight specified, the hook size needed, and any special stitches the pattern calls for. Many snowflake patterns use familiar basics like chains, single crochet, and double crochet, but some introduce beautiful textured stitches that create those delicate, lacy points.
Reading through completely helps you gather everything you need and prevents those frustrating mid-project pauses when you realize you’re missing a supply or don’t understand a stitch abbreviation.
Begin Crocheting Your Snowflake
The moment you pull the yarn around your hook for that first slip knot, you’re beginning a small winter miracle. Most snowflake patterns start with either a magic ring or a short foundation chain of 4-6 stitches joined into a circle. Don’t worry if your first attempt feels awkward, that initial ring is just the seed from which your snowflake will grow.
As you work your first round of stitches into that tiny center, you’ll feel the familiar rhythm of crochet settle over you. There’s something wonderfully meditative about working in rounds, watching each repetition bloom outward like frost spreading across a windowpane. Your pattern will guide you through chains and clusters, picots and double crochets, each round building on the last.
Keep your tension gentle but consistent, thread is delicate, and tight stitches can pucker while loose ones lose definition. Count your stitches at the end of each round to catch any mistakes early, when they’re still easy to fix. As the motif expands in your hands, you’ll begin to see the six-pointed symmetry emerge, that satisfying geometry that makes every snowflake unmistakably itself. This quiet, focused work is where the magic lives.
Complete the Snowflake Design
As you work through each round of your pattern, you’ll watch your snowflake blossom from a simple center into an intricate winter wonder. Keep your tension consistent, thread that’s too tight creates puckered points, while loose stitches make your snowflake floppy and undefined. The delicate nature of snowflake motifs means every stitch shows, so take your time and let the rhythm of your hook create magic.
Pay special attention to the final rounds where those signature snowflake points emerge. These outer edges define your design’s character, so count carefully and work each chain space and cluster exactly as written. If you notice one point looking larger than its neighbors, you’ve likely added an extra stitch, better to unravel now than discover it after stiffening.
When you reach the pattern’s final instruction, fasten off by cutting your thread about six inches from your work. Pull the tail through completely, then weave it invisibly through several stitches on the back before trimming close. Your snowflake may look limp and unremarkable at this stage, but that’s perfectly normal. The transformation happens in the next step, when stiffening reveals the crisp, lacy beauty you’ve been creating all along.
Stiffen and Block Your Finished Snowflake
This is where your delicate thread work transforms into something truly magical. Your finished snowflake might look lovely in your hands, but it won’t hold its shape or display its intricate details until you stiffen and block it properly.
Start by choosing your stiffening method. Traditional spray starch works beautifully and smells wonderfully nostalgic. For a budget-friendly option, mix equal parts white sugar and water, heating until the sugar dissolves completely. Fabric stiffener from craft stores offers the most reliable results and lasts for years. Whichever you choose, prepare enough solution to fully saturate your snowflake.
Pin your snowflake flat on a blocking board or piece of foam core covered with wax paper. Stretch each point gently outward, securing it with rust-proof pins to create perfect symmetry. Brush or spray your chosen stiffening solution generously over the entire snowflake, ensuring every loop absorbs the liquid. Don’t be shy here, thorough saturation is what creates that crisp, professional finish.
Let your snowflake dry completely, which typically takes 24 hours. The anticipation during this waiting period makes the final reveal all the sweeter. When you carefully remove those pins and lift your creation, you’ll hold a perfectly flat, wonderfully stiff snowflake that captures light and shadow like winter itself, ready to become part of your holiday magic.
How to Know Your Snowflake Is Perfect
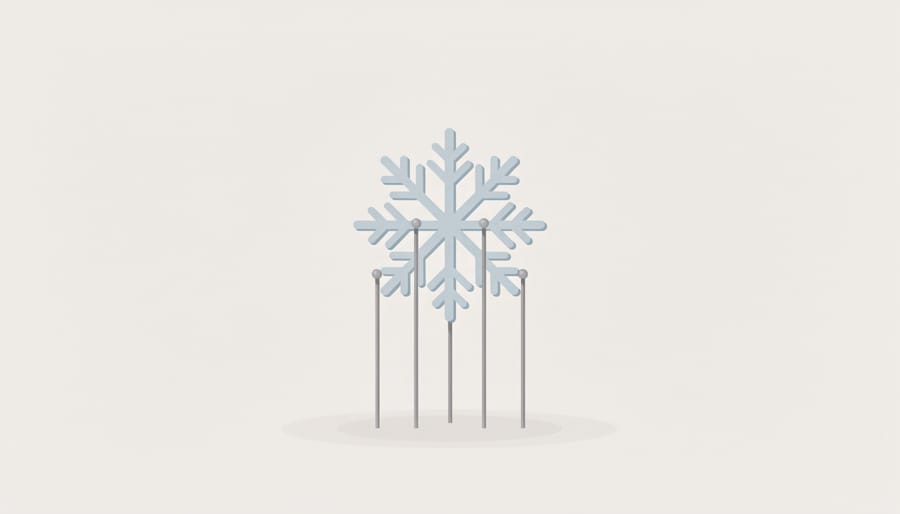
Hold your finished snowflake up to the light and admire what you’ve created. A perfect crochet snowflake lies completely flat with all points extending evenly from the center, like spokes on a wheel. The thread should feel stiff enough that the snowflake holds its shape when you lift it, not drooping or curling at the edges. Run your fingers gently across both sides, you shouldn’t feel any loose thread ends poking through.
Check that your blocking pins left no permanent dents and that each lacy section maintains its delicate openwork pattern. If one side of your snowflake curves upward slightly, it likely needs more stiffening solution or a longer drying time pinned flat. Uneven points often mean tension varied between rounds, but here’s a secret: those little irregularities prove a human made this with love, not a machine.
If your snowflake feels too limp, simply dip it back into your stiffening mixture and block it again. Too stiff and brittle? A lighter hand with the starch next time will do the trick. The beauty of thread crochet is that you can always adjust and improve. Once you’re satisfied with how it looks and feels, your snowflake is ready to become part of something magical.
Creating Your Winter Wonderland
Once your snowflakes emerge from their final blocking, stiff and perfectly formed, a world of decorating possibilities unfolds. These delicate creations deserve to shine throughout your home, transforming everyday spaces into enchanted winter scenes.
The Christmas tree is the natural showcase for your handiwork. Scatter snowflakes throughout the branches, letting them catch the light between ornaments, our ornament calculator can help you determine how many to make for balanced coverage. Pair white thread snowflakes with colored glass balls for classic elegance, or create an entirely white winter wonderland theme.
Windows become magical portals when you suspend snowflakes at varying heights using invisible fishing line. They’ll drift and spin gently in the warmth from the radiator below, casting intricate shadows across the room. Many families in Scandinavian countries have hung handmade snowflakes in windows for generations, signaling warmth and welcome to passersby on dark winter evenings.
String your snowflakes into garlands for mantels, doorways, or stair railings, the repetition of pattern creates mesmerizing visual rhythm. Attach them to wrapped packages as heirloom gift toppers that become part of the present itself. Incorporate them into your holiday table decoration ideas by scattering them across the tablecloth, using larger ones as coasters, or attaching them to napkin rings.
The beauty of creating collections is that each year adds new designs to your winter treasury, building traditions that children remember long after they’ve left home.
Common Questions About Crocheting Snowflakes
The questions that arrive most often in our cozy corner of the crafting world are as warm and genuine as the snowflakes themselves. Here are the answers to help guide your journey into this beloved winter tradition.
How long does it take to crochet one snowflake?
A simple beginner snowflake typically takes 20 to 45 minutes to complete, while more intricate intermediate designs like the Red Heart Tree of Snowflakes pattern might require one to two hours. Once you find your rhythm with a familiar pattern, you can create several in an evening of peaceful crafting.
Can beginners successfully make crochet snowflakes?
Absolutely, and they are wonderful first projects. Many free patterns are specifically designed for beginners, using basic stitches worked in simple rounds. Starting with small thread motifs helps you practice tension control without investing much time or materials.
What yarn works best for snowflakes?
Thread weight cotton (size 10 or 20) creates the most delicate, traditional snowflakes, while 4 ply yarn produces sturdier ornaments with bolder presence. Both work beautifully when stiffened, so choose based on your desired look and comfort with finer materials.
How should I store crocheted snowflakes between seasons?
Layer them gently between sheets of tissue paper in a flat box, keeping them away from moisture and direct sunlight. The same gentle care you would use for how to store garlands applies here, protecting your handmade treasures from crushing or tangling.
Will my snowflakes last year after year?
When properly stiffened and stored with care, crochet snowflakes become genuine heirlooms that last decades. Many crafters treasure snowflakes their grandmothers made, still crisp and beautiful after fifty years of holiday seasons.
Do I need special skills to stiffen snowflakes?
Not at all. The stiffening process is straightforward, whether you use commercial fabric stiffener, homemade sugar water, or traditional starch solutions. Simply soak, shape, pin flat, and let dry completely for professional-looking results.
These answers reflect the collective wisdom of generations who have transformed simple thread into winter magic. The beauty of this craft lies not in perfection, but in the quiet joy of creating something lovely with your own hands, one stitch at a time.
There’s something truly magical about holding a delicate crochet snowflake you’ve made with your own hands, knowing you created it from nothing more than thread and a hook. The best part? With countless free patterns available, this enchanting craft welcomes everyone, regardless of budget or experience level. Anyone can begin tonight.
As winter settles in and the world grows quieter, crocheting snowflakes offers a peaceful refuge from the rush of the season. The rhythmic motion of hook through thread becomes a meditation, each stitch a small act of creation that calms the mind and warms the heart. You’re not just following a pattern, you’re weaving memories into every loop and chain.
Years from now, when your children or grandchildren unwrap the ornament box and discover the snowflakes you made, they’ll hold more than decorations. They’ll hold your time, your care, and the love you stitched into those frosty afternoons. These fragile beauties become heirlooms, carrying stories from one generation to the next.
So pick up your hook and choose your first pattern. Let the magic begin.