

Transform your holiday display from tangled frustration to professional-grade brilliance by installing Christmas lights directly into the J-channel trim already surrounding your home’s windows and doors. This vinyl siding component, originally designed as architectural trim, features a convenient J-shaped channel that grips light strings securely without clips, nails, or adhesives that damage your home’s exterior.
The technique works beautifully because the channel’s natural grip holds standard C7 and C9 bulb sockets in place while keeping wires perfectly straight and evenly spaced. Homeowners discover they can outline their entire house in under an hour, creating those crisp, uniform lines that typically require professional installers and specialized equipment.
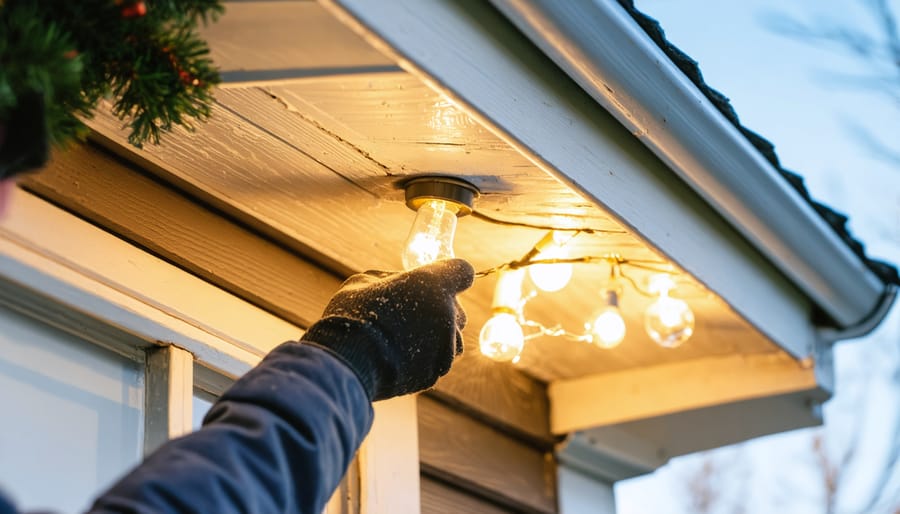
J-channel installation eliminates the annual ladder dance of hammering clips into frozen fascia boards or wrestling with adhesive hooks that lose their grip in cold weather. Instead, you simply press light sockets into the channel’s opening, where they lock snugly and remain protected from wind gusts that typically send unanchored displays into disarray. When the season ends, lights slide out effortlessly for storage, leaving no residue, holes, or faded marks on your siding.
This method particularly delights families who value both spectacular curb appeal and precious time spent together during the bustling holiday season. Rather than spending weekend afternoons precariously balanced on extension ladders, you’ll finish decorating quickly and safely, freeing those golden December hours for cookie baking, story reading, and memory making with loved ones gathered around twinkling displays you installed with confidence and ease.
What Exactly Is a J-Channel and Why Does It Matter?
Picture a gentle cradle, perfectly shaped to hold precious cargo—that’s essentially what a J-channel is, though you might not have realized it’s been quietly framing your home’s windows and doors for years. This unassuming piece of trim, named for its distinctive J-shaped profile, was originally designed as a practical finishing touch in vinyl siding installations. Like a picture frame that makes artwork shine, J-channel neatly tucks away the raw edges of siding where it meets windows, doors, and corners.
But here’s where the magic happens: that same curved channel that holds siding in place creates an absolutely perfect track for hanging lights on siding. Imagine a tiny monorail system running along your home’s trim, and you’ll understand why creative decorators started seeing stars—literally! The channel’s interior groove grips light strings securely without the need for clips, staples, or those frustrating adhesive hooks that inevitably lose their stick mid-season.
Think of it as the difference between balancing ornaments on branches versus hanging them securely from sturdy hooks. The J-channel transforms your holiday decorating from a precarious balancing act into a smooth, confident installation. Your lights nestle snugly into place, protected from wind gusts that would send loose strands flapping, and they create those crisp, professional-looking straight lines that make neighbors wonder if you hired a crew. What was once purely functional construction material has become the secret ingredient in creating those enchanting displays that make December nights sparkle with wonder, turning ordinary homes into beacons of holiday cheer that warm hearts throughout the neighborhood.

The Magic of J-Channel for Christmas Lights

Clean, Straight Lines Every Time
Remember driving through those picture-perfect neighborhoods at Christmastime, where every roofline glows with perfectly aligned lights that look like they were painted onto the house? That magical, professional appearance isn’t reserved for the families who hire expensive decorating crews. With J-channel, you can achieve that same crisp, magazine-worthy look right at your own home.
The secret lies in how J-channel creates an invisible framework that keeps your lights marching in perfect formation along your rooflines and eaves. Unlike traditional clips that can leave lights slightly askew or dangling at different heights, J-channel holds each bulb at exactly the same angle and distance from your home. The result is a seamless ribbon of light that follows your home’s architecture with precision.
This uniformity transforms your entire display from a casual decoration into something truly spectacular. When neighbors slow down to admire your handiwork, they’re responding to that clean, intentional look that says you care about creating something beautiful for your community. It’s the difference between homemade cookies arranged haphazardly on a plate and those same cookies artfully displayed on your grandmother’s cherished holiday platter. Both are wonderful, but one tells a story of thoughtful presentation that makes the season feel extra special.
Protecting Your Home and Your Lights
Picture this: you’ve spent hours creating the perfect twinkling wonderland, but the last thing you want is to damage the very home that holds all your cherished holiday memories. This is where J-channel truly shines as your home’s gentle guardian. When you’re protecting your home, this thoughtful method eliminates the need for nails, staples, or adhesive clips that can chip paint, puncture vinyl siding, or crack delicate shingles. The channel cradles your lights snugly without creating holes that invite moisture and winter’s harsh elements inside.
Throughout December’s blustery winds and surprise snowstorms, your lights remain steadfast in their cozy groove, dancing merrily rather than whipping wildly against your home’s exterior. There’s something wonderfully reassuring about knowing your festive display won’t scratch, dent, or mar the place where stockings hang and cookies bake. J-channel respects both your decorating dreams and your home’s integrity, ensuring that when the season ends and lights come down, your house looks just as beautiful as it did before the first bulb was hung.
The Time-Saving Wonder
Remember those evenings spent balanced on ladders, wrestling with tangled strings of lights while your fingers grew numb in the winter chill? The joy of decorating often came with the exhausting ritual of climbing up and down, adjusting each strand pixel by pixel until darkness fell. Then came the dreaded task of reversing it all in January, freezing and fumbling once again.
J-channel transforms this annual marathon into a swift, satisfying tradition. Once you’ve installed the channels along your roofline, future years become a delightful breeze. Simply slide your light strands into the channel’s groove, and they click into place like magic. No more precarious ladder dances or dropped clips scattering across your lawn. When the season ends, the lights slide out just as easily, leaving the channels ready and waiting for next year’s glow.
This ingenious system gives you back precious time to focus on what truly matters during the holidays. Instead of spending entire weekends on installation, you’ll find yourself finished in mere hours, ready to step back and admire your handiwork while sipping hot cocoa with your loved ones, creating memories rather than managing frustrations.
How to Install Christmas Lights Using J-Channel
Gathering Your Supplies
Before you transform your home into a twinkling winter wonderland, let’s gather everything you’ll need for this magical project. The star of our show is the J-channel itself, a simple vinyl trim piece you’ll find waiting for you in the siding section of any home improvement store like Home Depot or Lowe’s. Look for white vinyl J-channel in eight or ten-foot lengths, which typically costs just a few dollars per piece.
Next, you’ll need your beloved Christmas lights. Traditional mini lights work beautifully, though LED strands have become favorites for their durability and energy savings. Measure your roofline carefully before shopping, adding an extra ten percent to account for spacing and connections.
For installation, gather exterior-grade screws or small finishing nails, a sturdy ladder, measuring tape, tin snips or a utility knife for cutting the channel, and a drill or hammer. A helper makes the work safer and merrier too.
When selecting your J-channel, inspect each piece for straightness and check that the opening easily accommodates your light strand diameter. Some families prefer purchasing a bit extra for future repairs or expanding their display in years to come, keeping the holiday spirit ready whenever inspiration strikes.
Finding or Installing Your J-Channel
Before you can hang your twinkling treasures, you’ll need to discover where J-channel already graces your home or consider adding it to make your holiday dreams come true. Think of this as a cheerful treasure hunt around your house, where the prize is the perfect mounting spot for your festive lights.
Start your search by walking around your home’s exterior during daylight hours, paying special attention to the areas where your siding meets the soffit or fascia. J-channel typically lives in these transition zones, creating clean edges where different materials come together. You’ll recognize it by its distinctive J-shaped profile, usually running horizontally along the roofline or vertically around windows and doors. Run your fingers gently along these edges, and you’ll feel the channel’s opening where clips can slide right in.
If your home doesn’t have existing J-channel in ideal locations for your light display, don’t let your holiday spirit dim. Installing new J-channel specifically for Christmas lights is a wonderfully practical solution that homeowners have embraced for years. You can purchase vinyl or aluminum J-channel from most home improvement stores, choosing colors that blend seamlessly with your home’s exterior.
When installing new channel, safety comes first in creating your magical display. Always use a sturdy ladder on level ground, and consider having a helpful family member spot you from below. Work on calm, dry days when the weather cooperates with your festive plans. Secure the J-channel with appropriate screws or clips, ensuring it’s firmly attached to withstand winter winds and the weight of your lights. Remember, a safely installed display brings joy all season long without worry.

Hanging Your Lights the Professional Way
Now comes the magical moment when your J-channel transforms into a ribbon of twinkling wonder. Begin at one end of your channel, gently guiding the first light strand into the opening. The bulbs should nestle snugly in their new home, like ornaments settling into tissue paper. Work slowly and deliberately, savoring each section as it comes to life in your imagination.
Spacing is where the artistry truly shines. For that classic, evenly-lit look reminiscent of Main Street storefronts from Christmases past, position bulbs approximately six to eight inches apart. If you’re dreaming of a more dramatic display that captures gasps from passing carolers, tighten the spacing to four inches. The beauty lies in consistency, so take a step back every few feet to ensure your pattern flows smoothly along the roofline.
As you slide each strand deeper into the channel, you’ll feel a satisfying click when the bulbs lock into place. This is the J-channel’s gentle embrace, holding your lights secure against winter’s playful gusts. For added security on particularly exposed sections, small adhesive clips placed every few feet provide extra peace of mind without compromising the clean appearance.
Work your way methodically around eaves and edges, maintaining that rhythmic spacing that makes professional displays so captivating. When you reach corners, take extra care to keep bulbs facing outward, ensuring every angle glows with equal brilliance. Remember, patience during installation means seasons of effortless beauty ahead, creating memories that will warm hearts long after the lights come down.
Creative Ways to Use J-Channel Around Your Home
Roofline and Eaves
There’s something truly enchanting about that luminous crown of lights tracing the roofline of a home on a crisp December evening. This classic application remains the gold standard for creating that picture-perfect silhouette that delights neighbors and passersby alike. When using J-channel, start at one corner and work methodically along the eaves, gently tucking the light strand into the channel as you go. The beauty of this method is how it creates clean, straight lines that follow your home’s architecture precisely, transforming your house into a glowing beacon of holiday cheer. For best results, ensure your J-channel is securely fastened before inserting lights, and consider spacing clips every 12 to 18 inches for optimal support. Don’t forget to outline gables and peaks too—these architectural details add dimensional magic to your display. As you stand back to admire your handiwork, you’ll notice how the lights seem to float effortlessly along your roofline, creating that nostalgic scene reminiscent of cherished holiday memories and twinkling wonderlands we all treasure.
Windows and Doors
There’s something truly enchanting about doorways and windows adorned with twinkling lights that beckon guests inside with their warm, inviting glow. J-channel makes framing windows with lights remarkably simple, creating crisp, professional-looking borders that transform your home into a storybook scene. The channel’s hidden design ensures your lights follow perfectly straight lines around each window frame and doorway, eliminating the droopy, uneven appearance that can dampen the holiday spirit. Picture your front door surrounded by a radiant halo of golden light, guiding carolers and loved ones to your threshold. Windows become glowing portraits from the street, each pane a testament to the joy within your home. This method works beautifully whether you prefer classic white lights for timeless elegance or vibrant multicolored bulbs that dance with childhood memories of Christmases past.
Outdoor Structures
Your holiday magic shouldn’t stop at the main house. Those charming outbuildings and outdoor structures deserve their moment in the spotlight too! J-channel makes decorating garage doors, sheds, and workshops wonderfully simple, creating a cohesive glow across your entire property. Imagine your weathered garden shed transformed into a cozy cottage straight from a Christmas card, or your pergola draped in twinkling lights that dance through the wooden slats.
Fence lines become luminous borders that guide visitors through your winter wonderland, while detached garages shed their utilitarian appearance and join the festive celebration. The beauty of J-channel on these structures is its discreet nature, hiding mounting hardware while creating clean, professional lines that make even the humblest outbuilding look magazine-worthy. These often-overlooked spaces become treasured parts of your holiday display, extending the warmth and joy to every corner of your home.
Common Mistakes to Avoid (And How to Fix Them)
We’ve all been there – standing on a ladder with a string of lights in one hand and a vision of twinkling perfection in our hearts, only to encounter a few hiccups along the way. When you’re using J-channel for the first time, it’s easy to make small missteps that can lead to frustration. But don’t worry! These common challenges are simply part of the learning curve, and with a little guidance, you’ll be hanging lights like a seasoned pro in no time.
One of the most frequent mistakes is purchasing J-channel that’s too narrow for your light strand bulbs. Those chunky, nostalgic C9 bulbs that remind us of grandmother’s farmhouse might not slip easily into standard quarter-inch channels. The fix is wonderfully simple: measure your bulb bases before shopping, and look for J-channel with appropriate depth. Most mini lights work beautifully with standard channels, while larger bulbs need wider options.
Another tender mishap happens when families forget to account for corners and edges. Installing straight runs is delightful, but what about those tricky spots where your roofline turns? The solution is to cut your J-channel at 45-degree angles, creating clean mitered corners that guide your lights smoothly around bends. A simple miter box from the hardware store makes this incredibly easy.
Sometimes, in our excitement, we install the J-channel upside down or backward, which prevents the lights from sitting properly. Take a moment before securing anything permanently – the channel’s opening should face the direction that allows easy light insertion while keeping them secure against winter winds.
Finally, rushing through the installation without testing your lights first can lead to heartache when you discover a dead section after everything’s mounted. Always plug in and check those twinkling strands before they go up. Your future self will thank you with warm cocoa in hand, admiring a flawlessly glowing display.
As the evening shadows deepen and your J-channel lights flicker to life, casting their warm glow across frosted eaves and snow-dusted lawns, you’ve created more than just a beautiful display. You’ve woven a thread into the tapestry of neighborhood magic that transforms ordinary streets into wonderlands where children press their noses against car windows and families slow down just to take it all in. Whether you’ve tackled this project yourself or considered hiring professional installers, the result is the same: a home that radiates the very spirit of the season.
Those twinkling lights do something extraordinary. They pull families from their screens to the front porch, where steaming mugs of cocoa are shared and stories are told in the gentle radiance of a thousand tiny stars. Your neighbors will smile a little brighter, wave a little warmer, and somewhere, a child will whisper to their parents about the beautiful lights on your house. This is the gift of Christmas made visible, a luminous reminder that home is where the holiday heart glows brightest.


