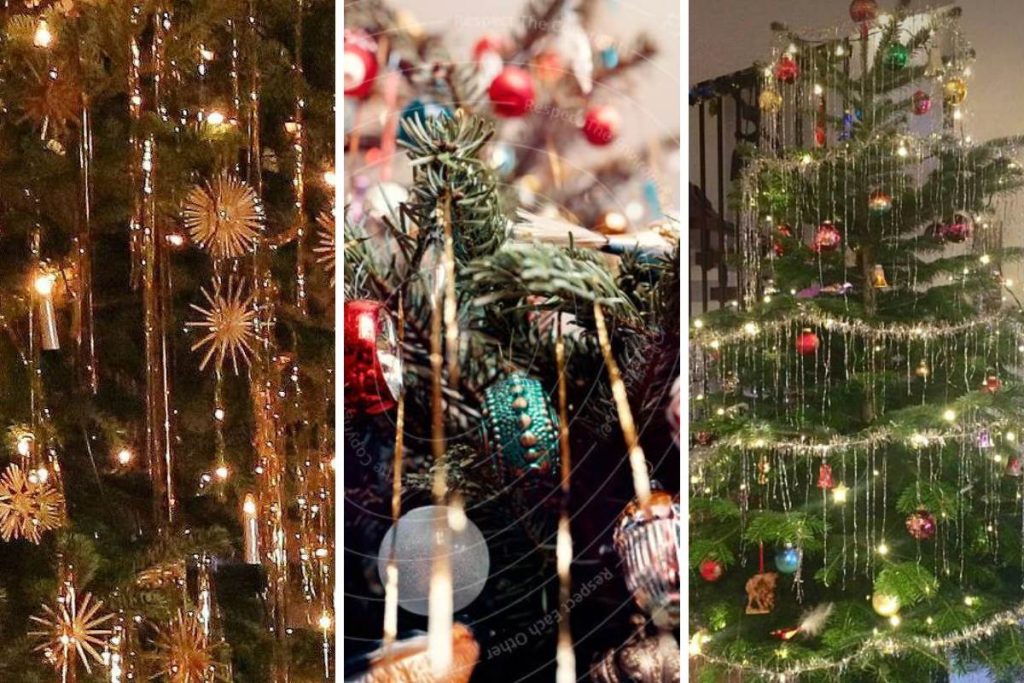
Tinsel is a great way to add a bit of sparkle to your Christmas tree. It can be draped and arranged in countless ways. Whether you prefer traditional silver tinsel or something more festive, adding tinsel to your Christmas tree will give it that extra special touch that will make all of your guests ooh and ahh this holiday season. Follow this step-by-step guide to learn how to put tinsel on a Christmas tree!
Hang the Christmas Tree Lights First
Before I put tinsel on my tree, I hang all 7 strands of Christmas lights first. This way, I can see how the tinsel will look with the lights and make sure it will be beautiful and sparkly.
I usually hang the tinsel on the Christmas tree last. This way, it can cover up any gaps or spaces that weren’t filled by other decorations. It also makes the tree look more festive and sparkly!
Choose the Tinsel

When choosing tinsel for your Christmas tree, there are a few things to consider. Firstly, decide whether you want traditional metallic tinsel or something more modern and creative. I usually choose this old-fashioned silver tinsel as the classic choice for a vintage tinsel Christmas tree look, but if you want to create a unique look, opt for something different. You can also find eco-friendly tinsel made from recycled materials or plastic-free options.
Next, consider the length of the tinsel you need. Generally, it’s best to get a longer piece that can be hung around the entire tree and then cut down as needed when decorating. This will ensure your tree is evenly covered with tinsel and give it an even shape.
Finally, think about the type of effect you want to achieve with your decorations. If you’re going for a sleek and modern look, opt for minimalistic thin strands of metallic tinsel draped across the branches in an organized fashion. For a more traditional look that sparkles from every angle, choose thicker pieces of metallic tinsel and hang them in layers over the entire tree.
Hang the Tinsel
Follow the 6-6 Rule (6 Strands per Branch and 6-inches Apart)
The 6-6 rule is a simple and effective guideline to follow when you add tinsel to your Christmas tree. It involves not hanging more than six strands of tinsel per branch and making sure the strands are spaced about 6 inches apart from each other. When you hang too many strands, the branches end up looking cluttered and weigh down the boughs of the tree. Similarly, if you’re too close together, it won’t look as full or vibrant.
Hang one Strand at a Time
The best way to hang tinsel is to take one strand at a time and loop it around the tree, starting at the top. You can make any pattern you wish or keep it simple with one layer of loops over each branch. You may also want to twist two pieces together for a thicker look that has both silver and gold colors.
Start With The Bottom Layer of Branches
Begin by starting with the bottom layer of tree branches first and work your way up towards the top. Use one hand to hold back two adjacent bottom layer branches while using your other hand to add tinsel. Drape the tinsel over both branches and then affix it to one of the branches using a light dab of glue or tape before releasing them. Do this for each pair of branches, making sure you’re keeping with the 6-6 rule.
After you’ve completed draping all bottom layer boughs in tinsel, start adding strands to any visible top layer boughs from underneath. This will give your tree a fuller look that’s more aesthetically pleasing.
Cover All Branches
Be sure to cover all branches when hanging tinsel. If the tree is too tall for you to reach, use a step stool or ladder. When you’re finished with one layer of branches, move up to the next one.
Finishing Touches
When you reach the top of your tree, add a few extra strands around the center trunk of your tree for visual balance and fullness. And voila! You’ve successfully decorated your Christmas tree with tinsel!


