There are three easy ways to hang Christmas lights on stucco: stucco hooks, glue, and double-sided tape. Here are the steps and tools you need.
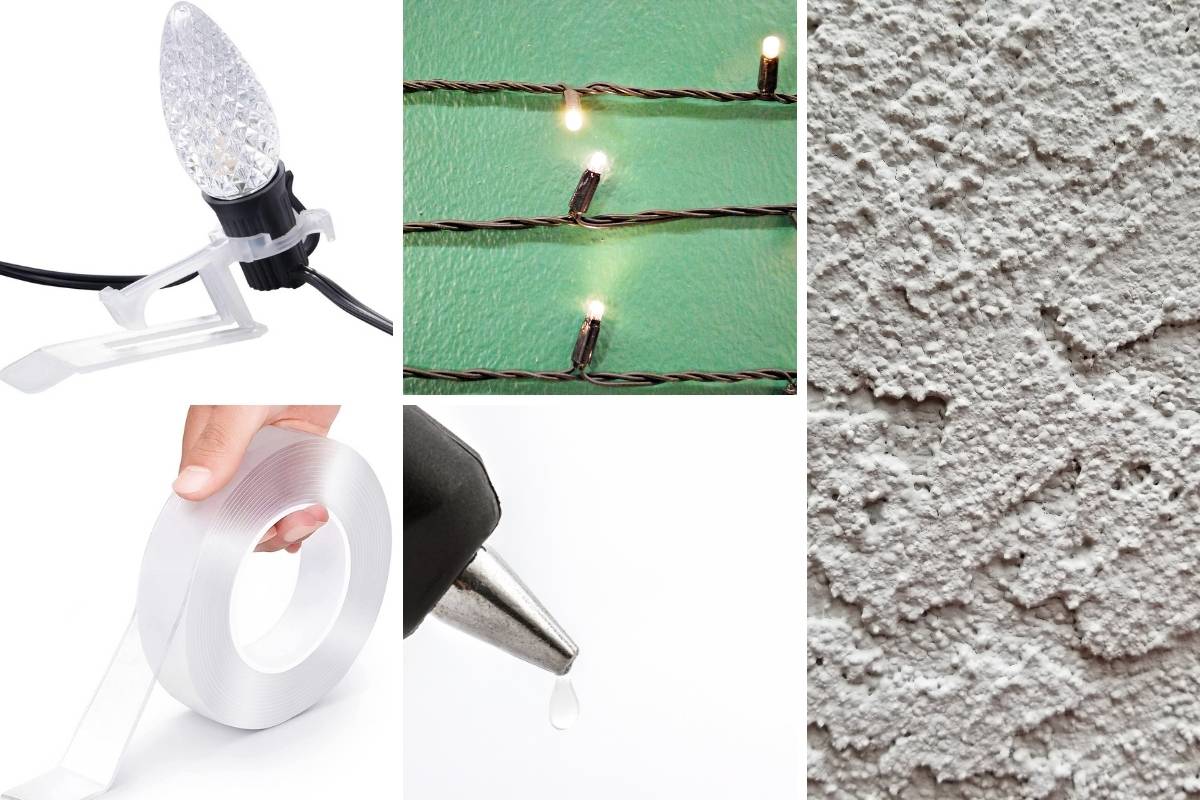
Option 1: Stucco Hooks
These hard wall hangers are a more permanent option with minimal damage to your wall. You need three things to make this method of hanging Christmas lights work: these stucco hooks, a hammer, and Christmas lights. Factors such as your light placement and lighting should determine how many hooks you buy.
These plastic hangers are ideal for using icicle lights (because they lack light bulbs) or string lights. Consider the length of your string light to ensure you buy enough clips to hang lights on stucco.
Steps
- Ensure you start the hanging process by placing the first hook on your wall. Use an auxiliary tool to clamp the first hanger.
- Hammer the four steel nails into the wall. This is the starting point.
- Once the first clip is secure, navigate the Christmas lights around the stucco wall of your home.
Option 2: Double-Sided Tape
This is a reliable way to hang string lights on a stucco wall. Double-sided tape will be a more reliable option if you reside in windy regions than plastic clips.
Tools
The tools you’ll need for this method include the following;
- Rubbing alcohol/TSP
- Dry microfiber cloth
- This Clear Double-sided Mounting Tape
- Your Christmas lights
Steps
- Before applying the double-sided tape, ensure you clean the part of your wall you want to use for hanging lights. We recommend using rubbing alcohol or trisodium phosphate (TSP) for effective cleaning.
- Apply a small quantity to the designated area and use a dry microfiber cloth to clean it off.
- Get your string light and double-sided tape. Place the rear of the tape on the back of the first light bulb.
- For the adhesion to be more effective, we recommend that you firmly hold the tape against your string light for about 30 seconds.
- Take off the tape cover from the other side and place your Christmas lights on the stucco wall.
- Again, hold the lights in place for roughly 30 seconds to stick properly.
- Continue the steps mentioned above to work your way around the home. Similar to the clips, you can go counterclockwise or clockwise.
Option 3: Hot Glue
Just like double-sided tape and roof clips, certain rules apply to using glue to hang string lights. You’ll need a glue gun for this process.
The first rule is to check if your stucco has styrofoam backing or not. This inspection is because applying hot glue isn’t suitable for such stucco surfaces. Hot glue is capable of melting styrofoam backing.
Check by tapping the surface. If the feedback is subdued, your wall surface has styrofoam backing. If the feedback is loud, there’s no styrofoam backing. Sometimes, you will get a subdued sound and still want to apply hot glue for hanging string lights. This is where the second rule comes in. We strongly advise using hot glue meant to melt at low temperatures.
The third rule is to use a glue gun that’s equipped with a low-temperature configuration.
The fourth rule is to use glue with low bonding strength. This makes it easy to remove the Christmas lights after the holiday season.
The fifth rule is to apply hot glue on unpainted surfaces. Hot glue can trigger peeling if you apply it to painted stucco.
Tools
- Glue sticks with a hot glue gun
- Christmas lights
Steps
- Please take out the bulbs before you put up the light string to ensure that the hot glue won’t touch them.
- Put the glue in the hot glue gun and leave it for a few minutes to become hotter.
- Now you have a string of empty light sockets, get your glue gun, pull the glue gun’s trigger, and apply a tiny quantity of the hot glue to the side of the first empty bulb socket. Take care while doing this to ensure the hot glue doesn’t touch the bottom of the light socket. If it does, removing your bulbs will become much more difficult.
- After you’ve applied hot glue to the side of the light socket, place the light socket on the wall for about 5 seconds. This is enough time for the hot glue to dry. You may need to hold it for a little longer in some cases.
- Repeat the above step for the other light sockets and ensure there’s equal spacing between each light bulb socket.
After attaching the light socket(s) to the stucco, you can replace the light bulbs. There are cases where you’ll make mistakes as you work your way around the exterior of your home. This is where you’ll need your heat gun. Use this tool to soften the glue and detach the light socket you didn’t install correctly. This tool will also be handy for taking these lights down after the holidays.